Difference between revisions of "ESPEasy"
| Line 11: | Line 11: | ||
Connect with your laptop or tablet to ip 192.168.4.1 and enter the config tab to change SSID and WPA key. Now reboot the device and it should join your own local network. | Connect with your laptop or tablet to ip 192.168.4.1 and enter the config tab to change SSID and WPA key. Now reboot the device and it should join your own local network. | ||
| − | == | + | == Get started == |
| − | + | To get you on track with the ESP Easy, we provide a tutorial to demonstrate the basics [[Tutorial_Domoticz_Switch]] | |
| − | + | For all further applications, please check their respective wiki page [[Main_Page#Applications | Applications]] | |
= Logging = | = Logging = | ||
Revision as of 11:14, 29 August 2015
Contents
Introduction
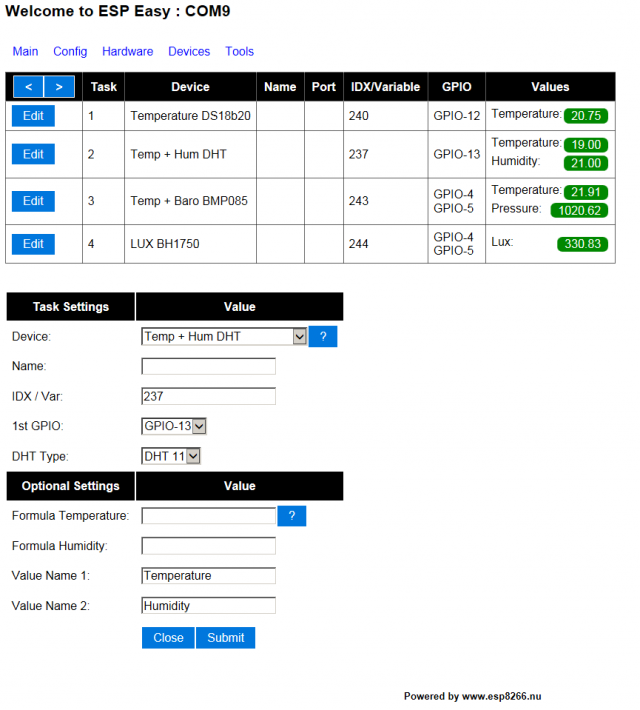
The ESP Easy firmware can be used to turn the ESP module into an easy (more or less plug & play) sensor/actuator device for Home Automation solutions like Domoticz. Configuration of the ESP Easy is entirely web based, so once you've got the firmware loaded, you don't need any other tool besides a common web browser.
The ESP Easy firmware is currently in alpha stage where we're working on design, functionality and stability. Beware that things might change considerably in this stage. We have launched the firmware to get feedback on the project. Once things are a little bit more settled, we plan to freeze things a bit and move to "beta" to focus only on fixing bugs...
Configuration
The ESP Easy has a userfriendly web interface for all configuration settings. After initial upload the ESP does not have a valid SSID and WPA key and it will start in Access Point mode with the WPA key "configesp"
Connect with your laptop or tablet to ip 192.168.4.1 and enter the config tab to change SSID and WPA key. Now reboot the device and it should join your own local network.
Get started
To get you on track with the ESP Easy, we provide a tutorial to demonstrate the basics Tutorial_Domoticz_Switch
For all further applications, please check their respective wiki page Applications
Logging
Sample:
DS : Temperature: 21.12 HTTP : Connecting to 192.168.0.8 HTTP : Requesting URL: /json.htm?type=command¶m=udevice&idx=113&svalue=21.12 HTTP : Succes! HTTP : Closing connection DHT : Temperature: 22.00 DHT : Humidity: 19.00 HTTP : Connecting to 192.168.0.8 HTTP : Requesting URL: /json.htm?type=command¶m=udevice&idx=148&svalue=22.0 HTTP : Succes! HTTP : Closing connection LUX : Light intensity: 720.00 HTTP : Connecting to 192.168.0.8 HTTP : Requesting URL: /json.htm?type=command¶m=udevice&idx=149&svalue=720.0 HTTP : Succes! HTTP : Closing connection ADC : Analog value: 556 HTTP : Connecting to 192.168.0.8 HTTP : Requesting URL: /json.htm?type=command¶m=udevice&idx=150&svalue=556.0 HTTP : Succes! HTTP : Closing connection RFID : Tag : 12445313 HTTP : Connecting to 192.168.0.8 HTTP : Requesting URL: /json.htm?type=command¶m=udevice&idx=151&svalue=12836313.0 HTTP : Succes! HTTP : Closing connection
Loading firmware
todo...
