Difference between revisions of "Tutorial Arduino Firmware Upload"
| Line 1: | Line 1: | ||
| + | = Download and installing the Arduino IDE = | ||
Download and install Arduino 1.6.5. from https://www.arduino.cc/en/Main/Software | Download and install Arduino 1.6.5. from https://www.arduino.cc/en/Main/Software | ||
Revision as of 17:50, 31 August 2015
Download and installing the Arduino IDE
Download and install Arduino 1.6.5. from https://www.arduino.cc/en/Main/Software
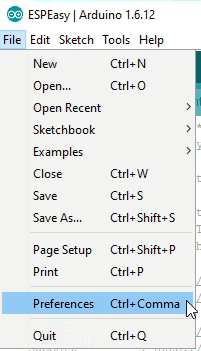
Launch arduino.exe and select preferences
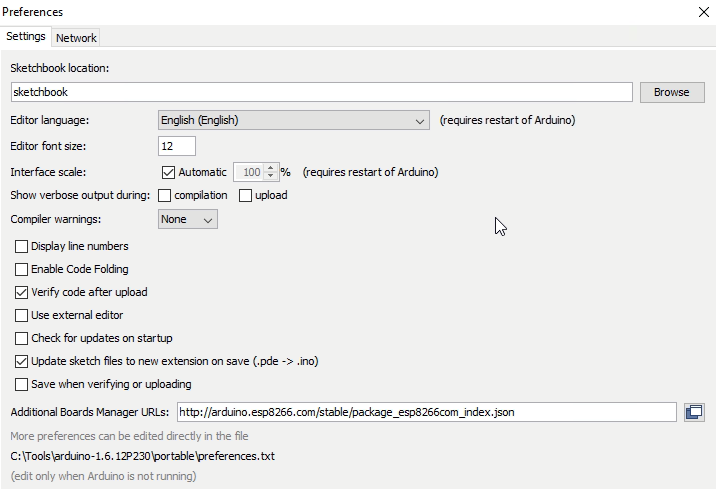
Enter the URL for additional boards. Currently we use the staging version so you should enter:
http://arduino.esp8266.com/staging/package_esp8266com_index.json
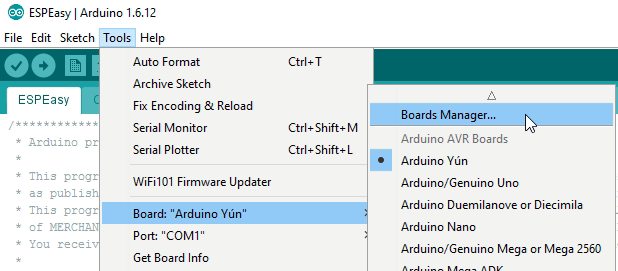
Now navigate to the board manager
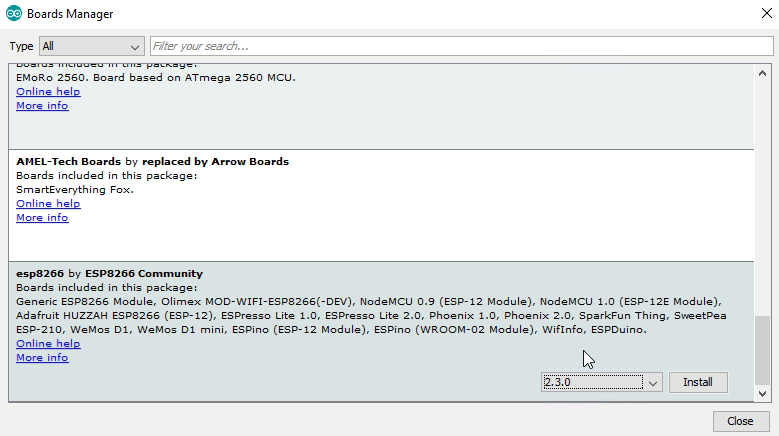
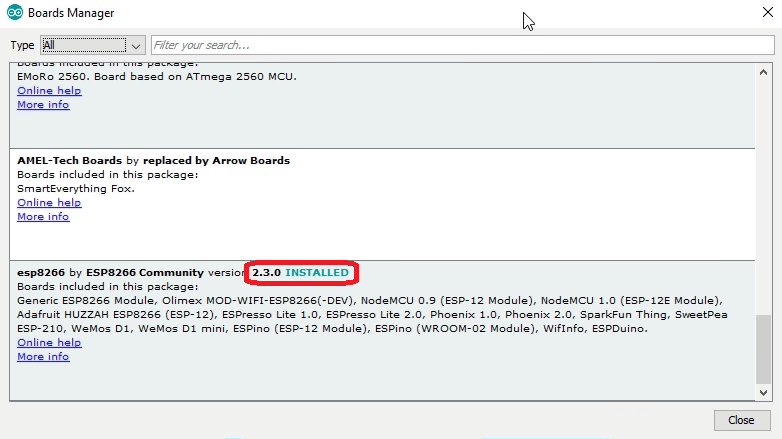
You should see the ESP option
Click install (this will take some time, be patient, it should download approx. 450 MB)
Download ESP Easy Firmware
Download the latest version from sourceforge: http://sourceforge.net/projects/espeasy/files
The zipfile contains two folders. Unpack the zipfile to some folder of your own choice
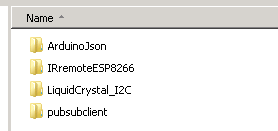
The libraries folder has 3 libraries. These folder should be copied to the Arduino libraries folder
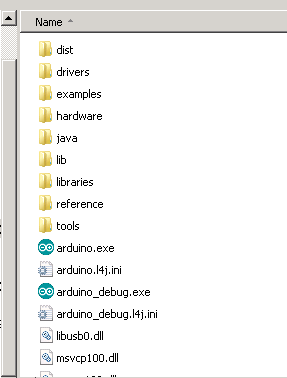
This is the folder structure for Arduino IDE. You can see the libraries folder in here.
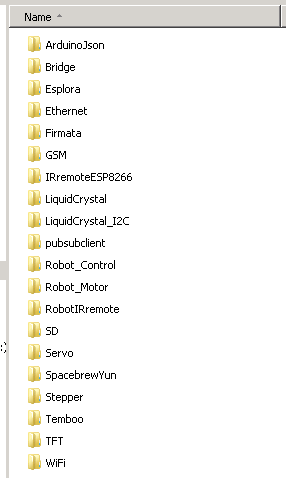
Once the additional libraries are copied, it should look like this:
Compile and upload
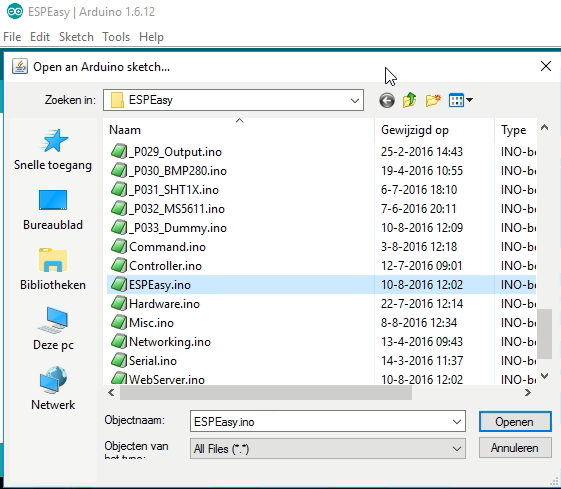
Launch Arduino IDE and navigatie to the ESPEasy folder. Open ESPEasy.ino
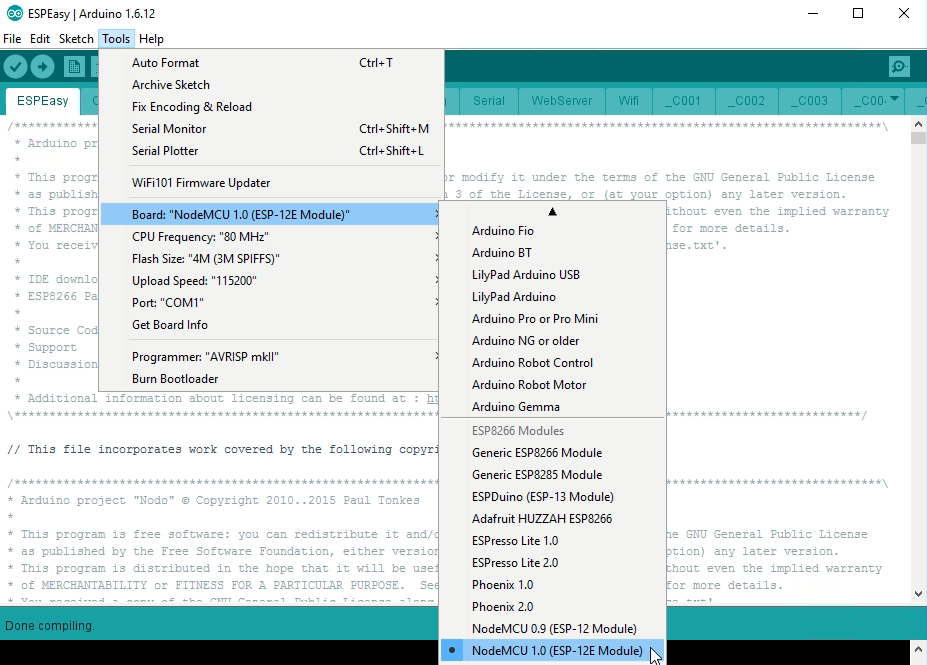
It's important the select the right ESP board. In our case we use the NodeMCU V1.0 board:
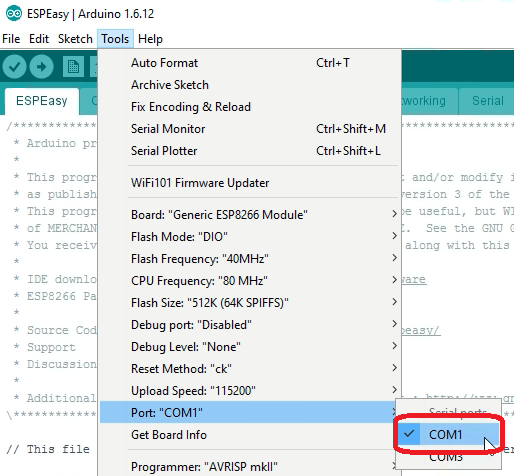
And select the right COM port:
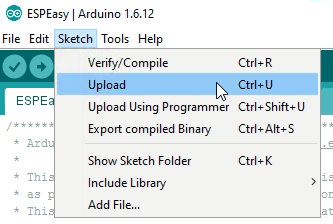
Finally, upload the sketch to your ESP board:
